

Introduction
By default, every MSP Process Client Portal has a URL of https://<name>.mspprocess.net. As branding is critical for MSPs, and your customers may not know who MSP Process is or what services we offer, we allow you to create a fully whitelabeled custom domain for your Client Portal. This KB article will walk you through how to setup that Custom Domain, and apply it to your Client Portal.Prerequisites
- You must have access to an Admin-level user account in MSP Process
- You must have a Client Portal already setup, under the AI Service Desk -> Client Portal -> Configurations page
- You’ll need access to your DNS provider, and the ability to add new DNS records
Creating a Custom Domain
- Login to MSP Process (https://app.mspprocess.com) as an Admin-level user
- Navigate to the Settings -> Account Settings -> Custom Subdomain page
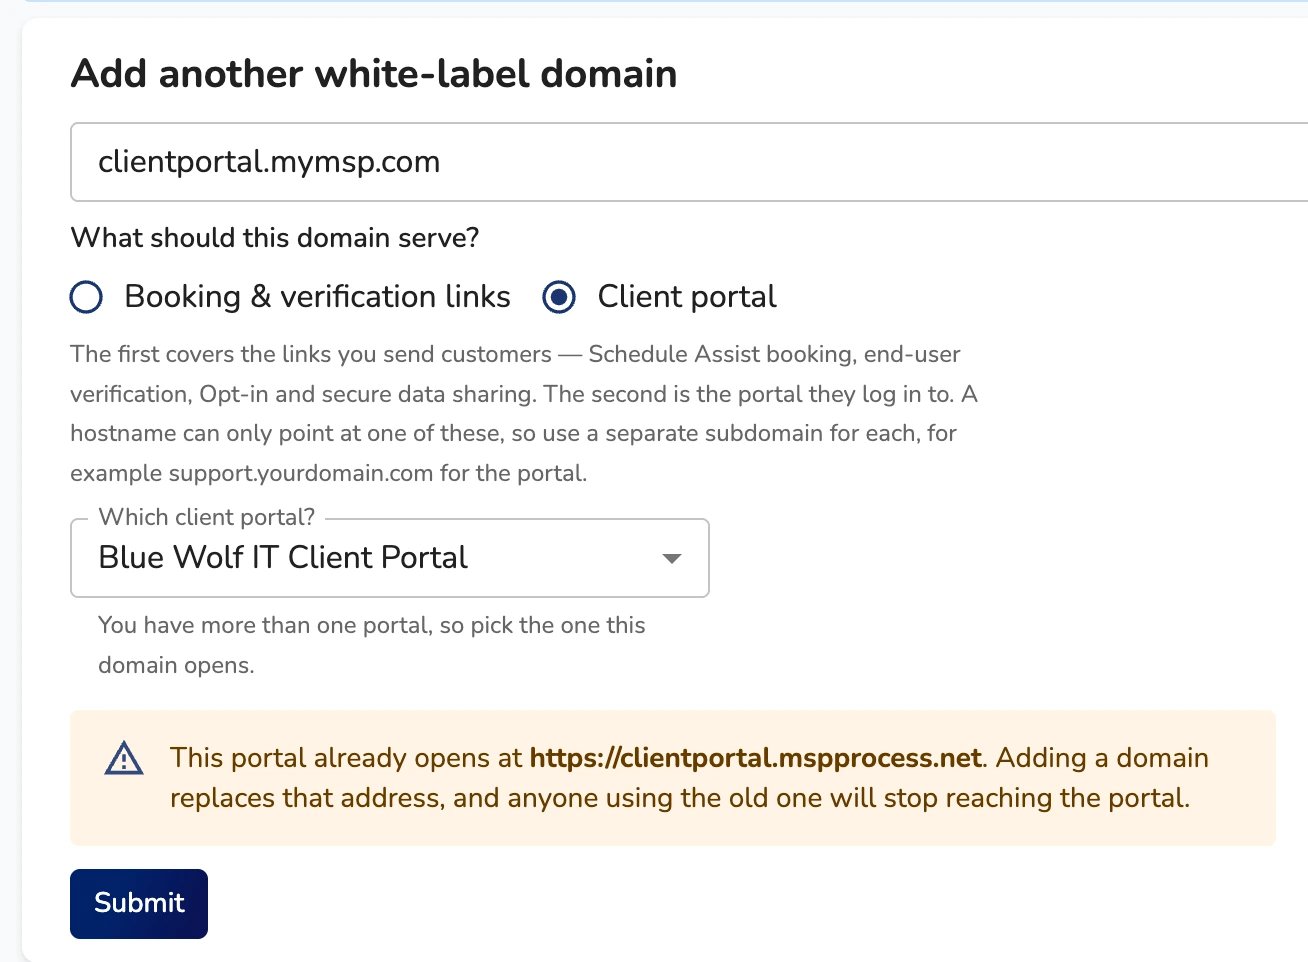
- Configure the page as follows:
- Specify the domain name you want to use - for example, clientportal.mymsp.com
- For the What should this domain serve? option, select the Client portal radio button
- From the drop-down menu, choose your Client Portal
- Click the Submit button
- You’ll then be presented with the DNS records you need to add to your DNS provider; add them, and then click the Validate button in Step 3:
-
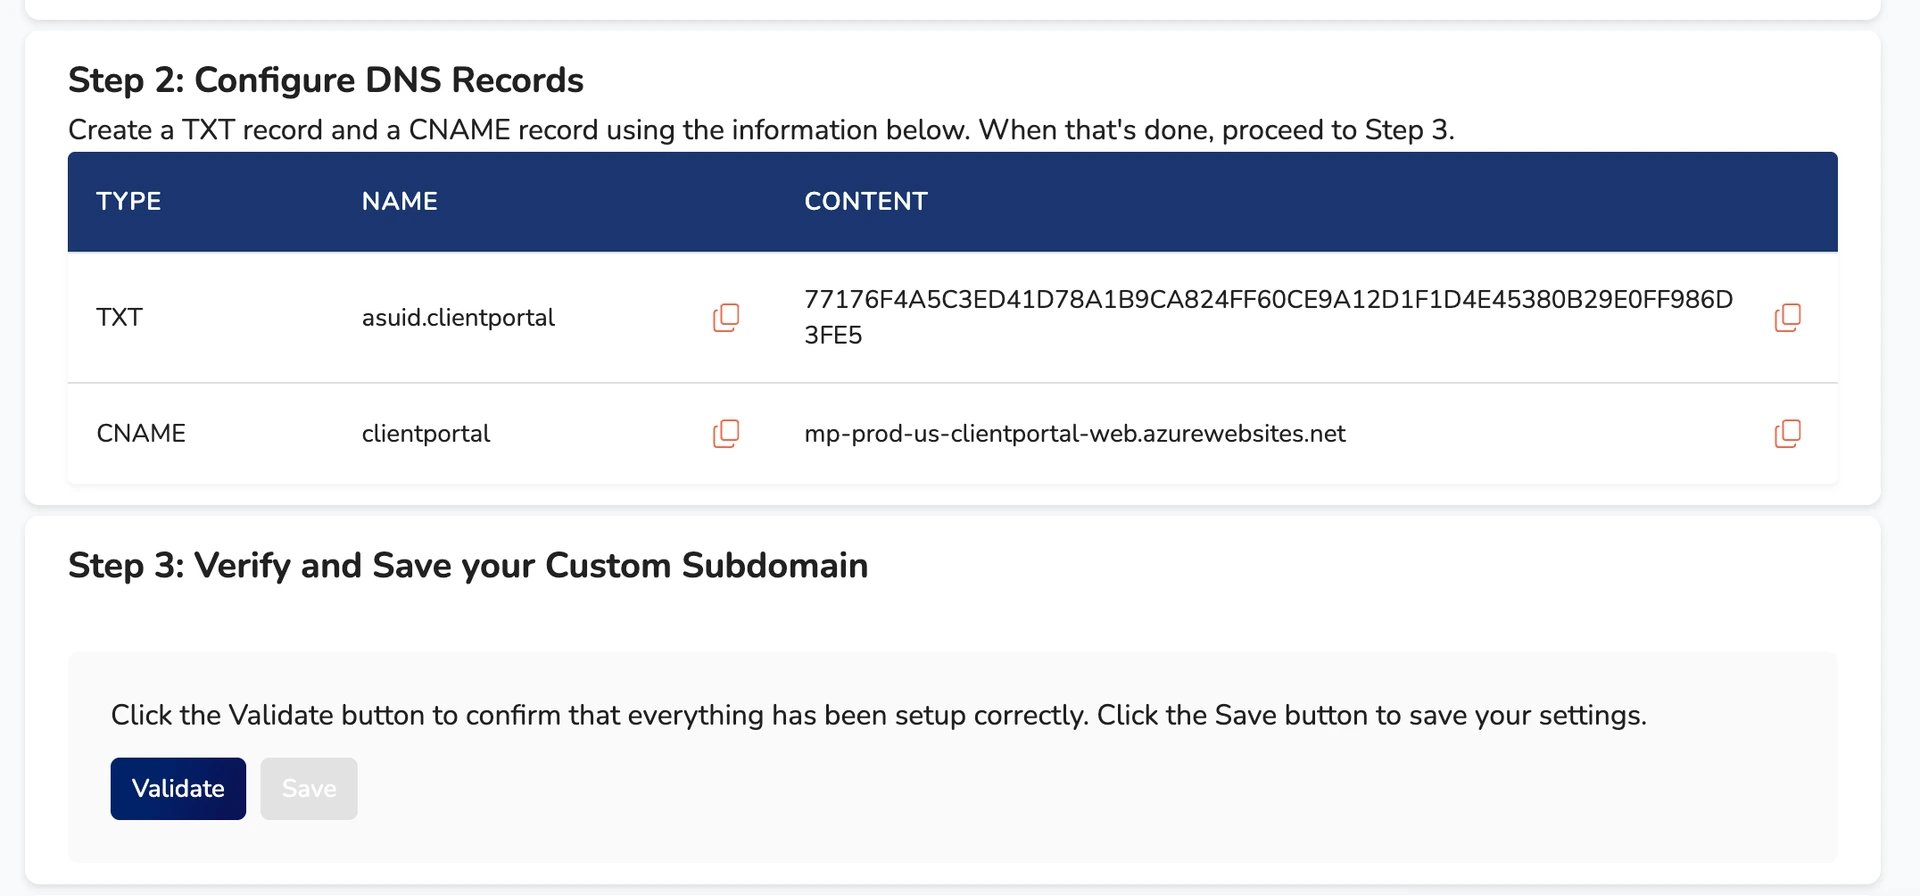
- Finally, you’ll need to create the SSL certificate, and then bind the SSL certificate to your new website
- NOTE: Your domain is hosted in Azure, and Microsoft needs approximately 10 minutes to create and make available the SSL certificate before you can bind it to the website.