

Overview
MSP Process allows partners to add custom tabs to their Client Portal, giving admins a way to surface external resources (learning sites, invoicing UIs, knowledge bases, and more) directly within the portal navigation. This gives end-users a single place to manage tickets and access other resources they need! Each partner can configure up to five custom tabs per Client Portal, which can either open embedded within the portal (iframe) or launch in a new browser tab. Custom tabs are only available in the web version of the Client Portal.- For Custom tab creation for the Client Portal in the Teams app, please review How to Add Custom Tabs to Your Microsoft Teams App
Prerequisites
- Admin-level user access is required to create, edit, or delete custom tabs.
- The destination URL must use HTTPS://
How To Setup Custom Tabs
Create a Custom Tab
- Log into MSP Process.
- Navigate to AI Service Desk -> Client Portal -> Custom Tabs.
-
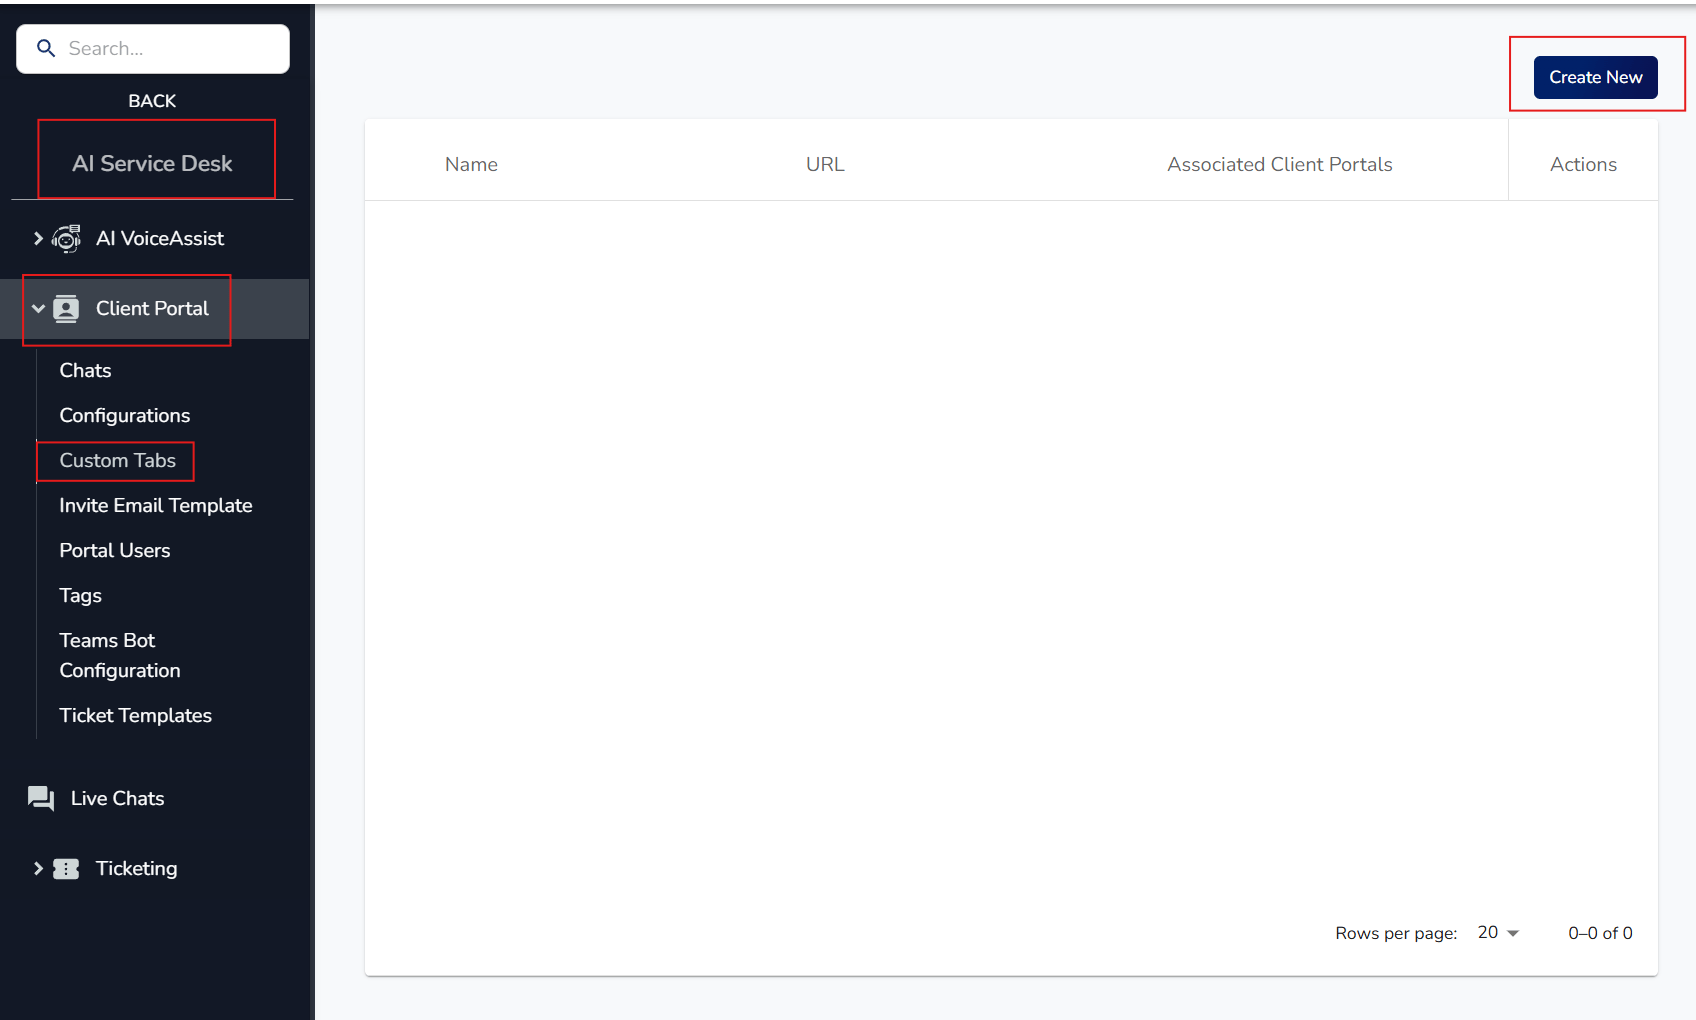
- Click Create New.
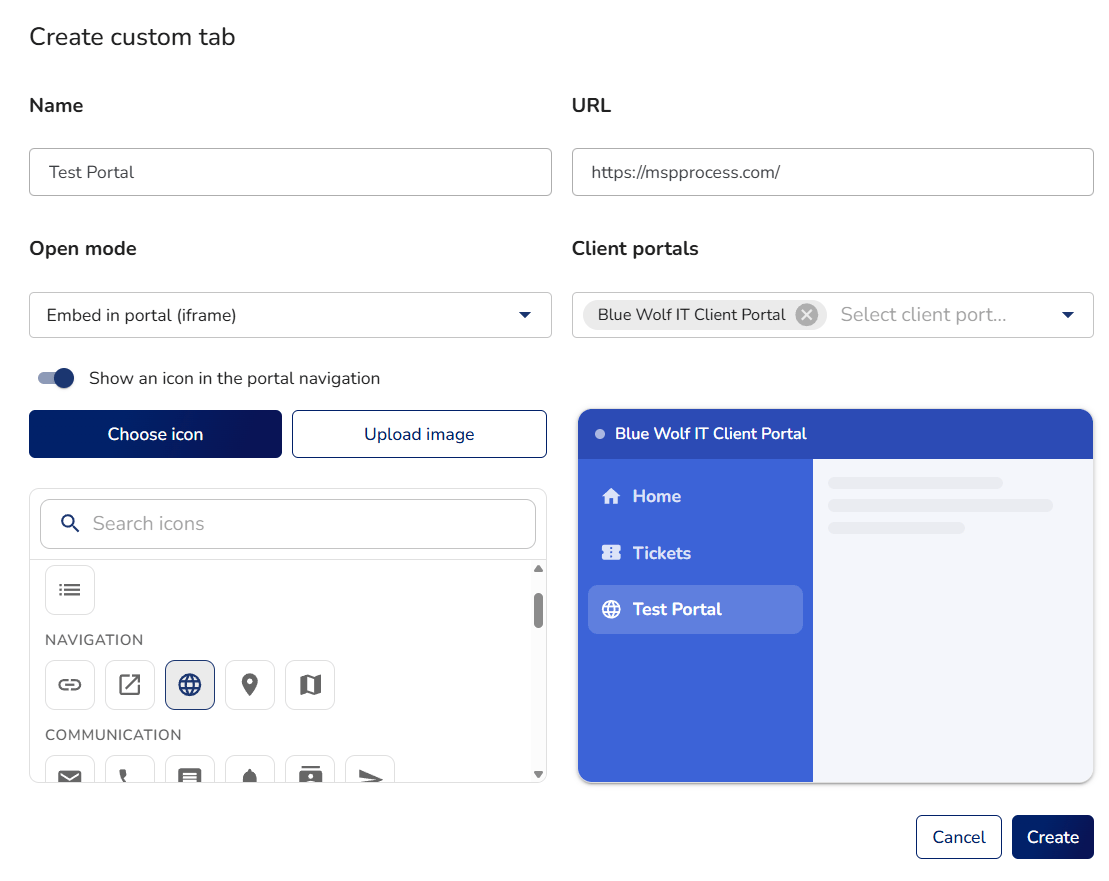
- Enter a name for the tab.
- Go to the URL information box and paste in the target URL (must be HTTPS://).
- Choose the Open Mode:
- Embedded (iframe) — loads the page inside the portal
- New Browser Tab — opens the link externally
- Select which Client Portal(s) the tab should be available in.
- Choose whether to display an icon in the portal navigation:
- Select from preloaded icons, or
- Upload a custom image.
- Click Create to save.
-
Viewing the Custom Tab in the Client Portal (Web)
- Log into the Client Portal (web).
- On the left-hand navigation, below Home, Tickets, Ticket Chats, and Invoices, the new custom tab will appear.
- Click the tab to view it:
- If set to iframe, the content loads directly within the portal.
- If set to New Browser Tab, a small arrow icon appears next to the tab indicating it will open externally.