Overview:
Onboarding and offboarding employees is something MSPs always look to make as efficient as possible. By taking advantage of Microsoft’s support for the SCIM protocol, it’s easy to provide your technicians with access to MSP Process simply by adding and removing them from Security Groups in Microsoft 365. This KB article will walk you through the steps you’ll need to follow. Please note: If you became an MSP Process partner before Dec. 2025, you will have setup an earlier version of our Microsoft SSO module. Any of your employees setup in that way will be seamlessly migrated to this new version of our Microsoft SSO module, without any interaction on their part.Creating the Groups in Microsoft Azure
You’ll be creating two Groups in Azure - one for users who should have the Admin role in MSP Process, and another for users who should have the Technician role in MSP Process.- Launch the Azure management portal (https://portal.azure.com)
- Browse to Groups.
- On the left side click on All Groups.
- At the top of the page click on New group.
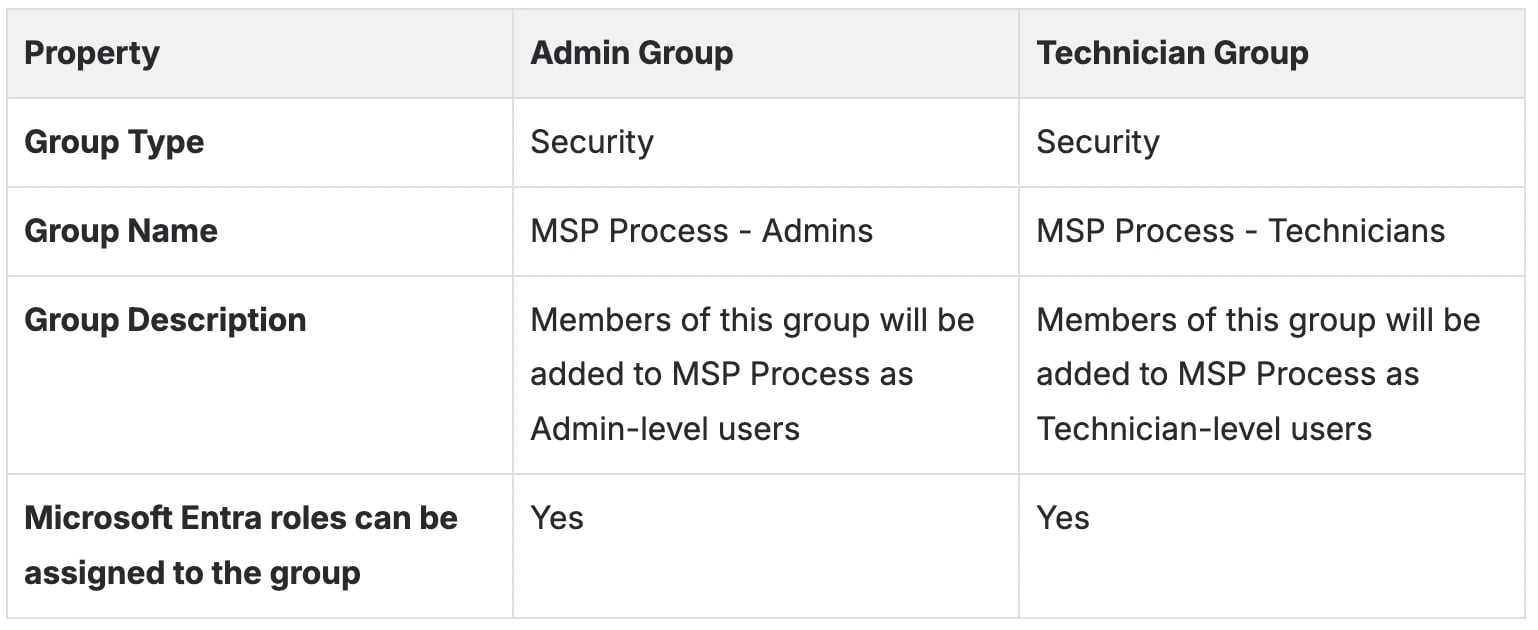
- You’ll be creating two groups, one at a time, with the following properties:
Adding Users to the Groups
Next, edit each Group in Azure, and add the appropriate users into their respective groups.- Admin-level users should go in the MSP Process - Admins group.
- Technician-level users should go in the MSP Process - Technicians group.
Important: Please follow the instructions outlined above carefully for “Creating the Groups in Microsoft Azure” and “Adding Users to the Groups”, as these are critical steps. Failure to complete these steps as directed may result in additional charges, as MSPs are billed on a per-technician basis.
Grabbing the Tenant URL and Secret Token from MSP Process
There are two values - a Tenant URL, and a Secret Token - that you’ll need to grab from MSP Process before heading into Microsoft Azure:- In a separate browser tab, login to the MSP Process platform (https://app.mspprocess.com) as an Admin-level user
- Navigate to the Settings -> User Management -> SSO page
- Copy the Tenant URL and Secret Token values
Creating the Enterprise Application in Microsoft Azure
- Launch the Azure management portal (https://portal.azure.com)
- Browse to Microsoft Entra ID.
- On the left side click on Enterprise applications.
- At the top of the page click on + New application.
- Click on the + Create your own application.
- Add the name of the application, for instance MSP Process SCIM.
- Click on the radio button Integrate any other application you don’t find in the gallery (Non-gallery) and click Create.
- On the Overview blade, click the + New configuration button
- The New provisioning configuration page will be displayed; you’ll be filling in the Tenant URL and Secret Token with values from MSP Process
-
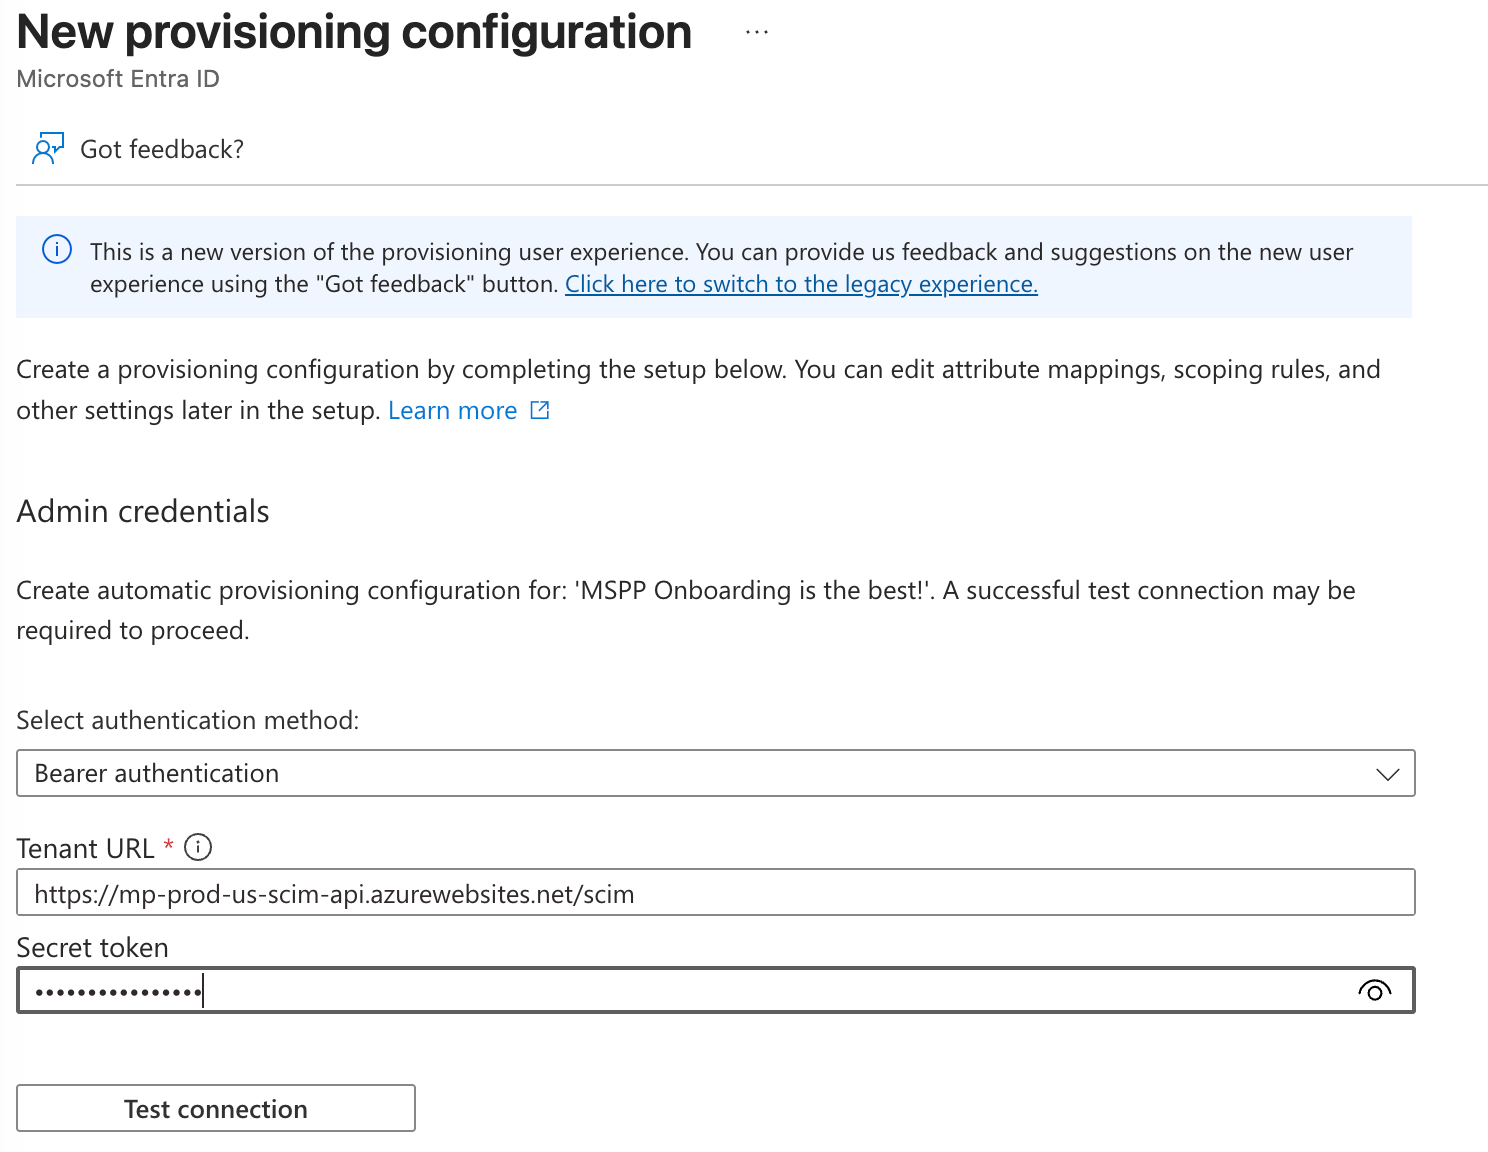
- Click the Test connection button to confirm that Azure can communicate with MSP Process
- Click the Create button to finish creating the provisioning configuration
Configuring the Enterprise Application in Microsoft Azure
- Navigate to the Manage -> Provisioing section of the Enterprise application
- Expand the Mappings section
- Click on Provision Microsoft Entra ID Groups, make it disabled and Save the change.
- Click on Provision Microsoft Entra ID Users.
- Make sure that the following attribute mappings are set:
- userName -> userPrincipalName
- displayName -> displayName
- externalId -> objectId
- NOTE: Make sure to update this setting, or it will cause failed login attempts.
-
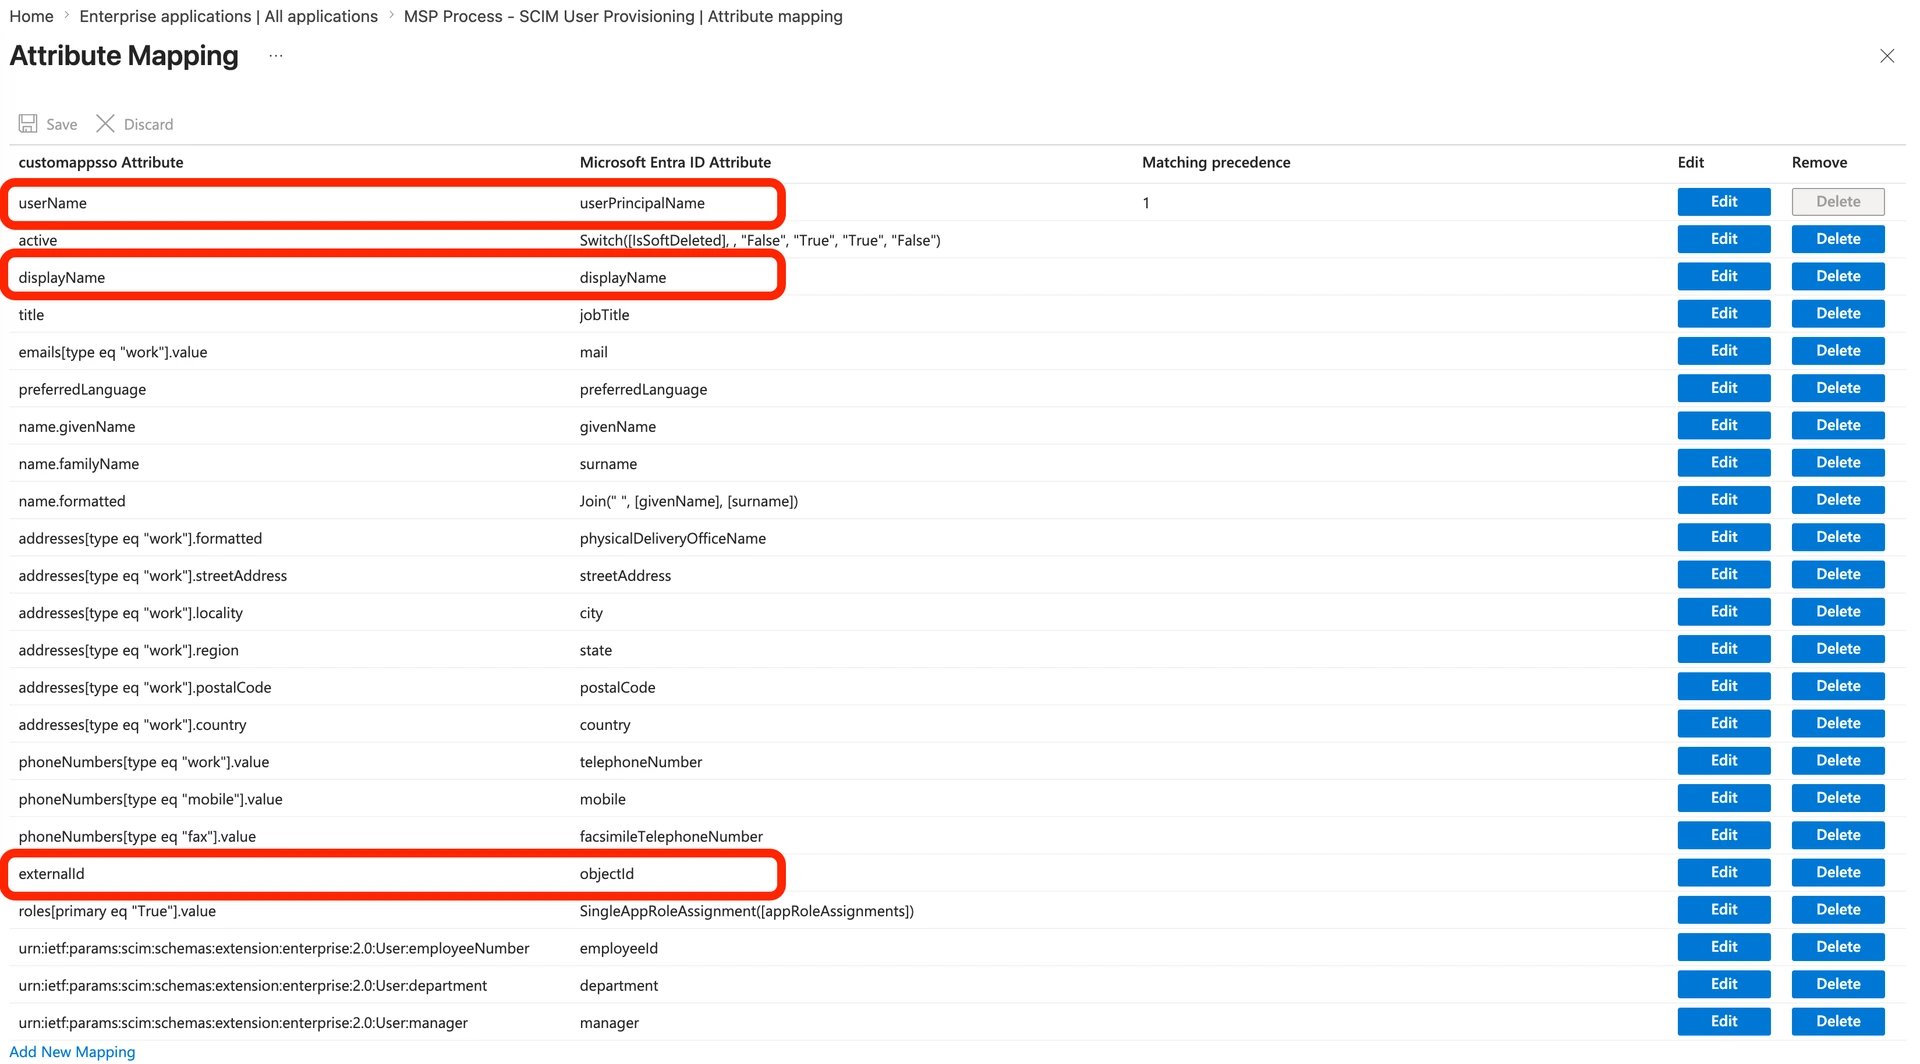
- Click on Add New Mapping button at the bottom of the page
- Configure it as shown below:
- Mapping Type= Expression
- Expression = SingleAppRoleAssignment([appRoleAssignments])
- Target Attribute = roles[primary eq “True”].value
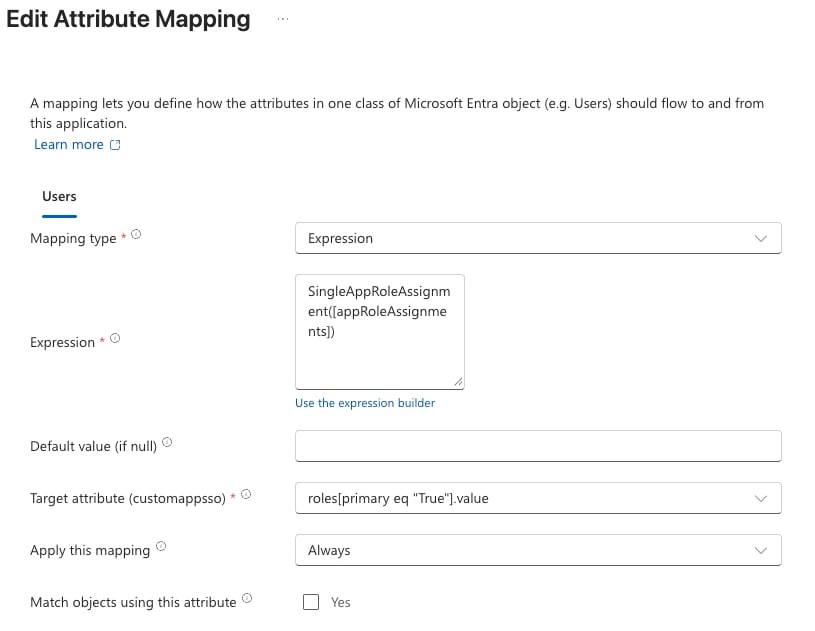
- Save the user mappings changes.
Configuring the App Registration in Azure
- In a new browser tab login to Azure, go to App registrations and find the App Registration that’s been created.
- On the left side under Manage, click on App roles.
- Edit the User role, and uncheck the “Do you want to enable this app role? ” option
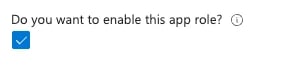
- Save the change
- Edit the User role again, and click on the Delete button
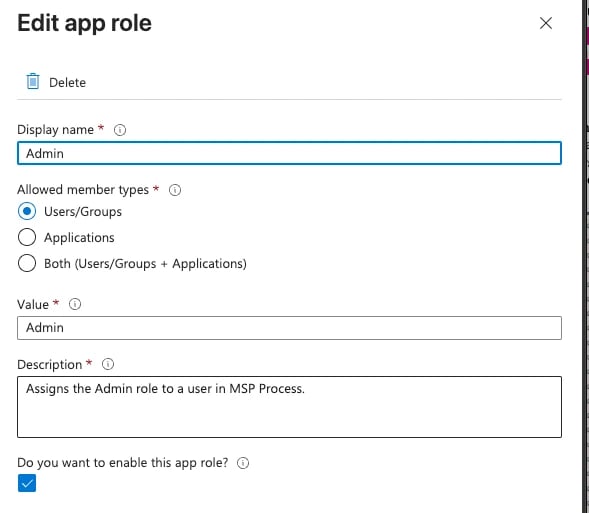
- Click the Create app role button
- You will go through this process twice to create two roles: Admin and Technician roles
- Both the Display name and the Value here needs to exactly match “Admin” or “Technician”, as this is what assigns the user a specific role in MSP Process.
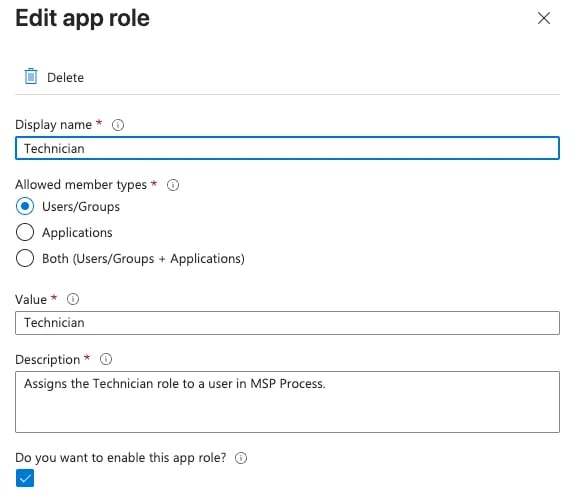
Pushing Users from Microsoft Into MSP Process
You’ll be running through the following steps twice - one for each Group you created at the beginning of this KB article.- In the other browser tab, where you were editing the Enterprise Application, click on the Manage -> Users and Groups tab.
- Click + Add user/group.
- Click the MSP Process - Admins group.
- Click the Admin Role for the group and click Assign.
- Repeated steps 1-4 for the MSP Process - Technicians group; assign it the Technician Role
- On the left side under Manage, click on Provisioning.
- Click the Start provisioning button.
Results!
It’ll take anywhere from 10-40 minutes for Microsoft to provision users into MSP Process; it depends on how many users you’ve got in the Security Groups. If you’re interested in how Microsoft describes why provisioning through SCIM can take a bit of time, and what you should expect in your specific circumstance, check out this KB article: Check the status of user provisioning You can see how things are going from the Settings -> User Management -> Users page in MSP Process.Logging in as as Provisioned User
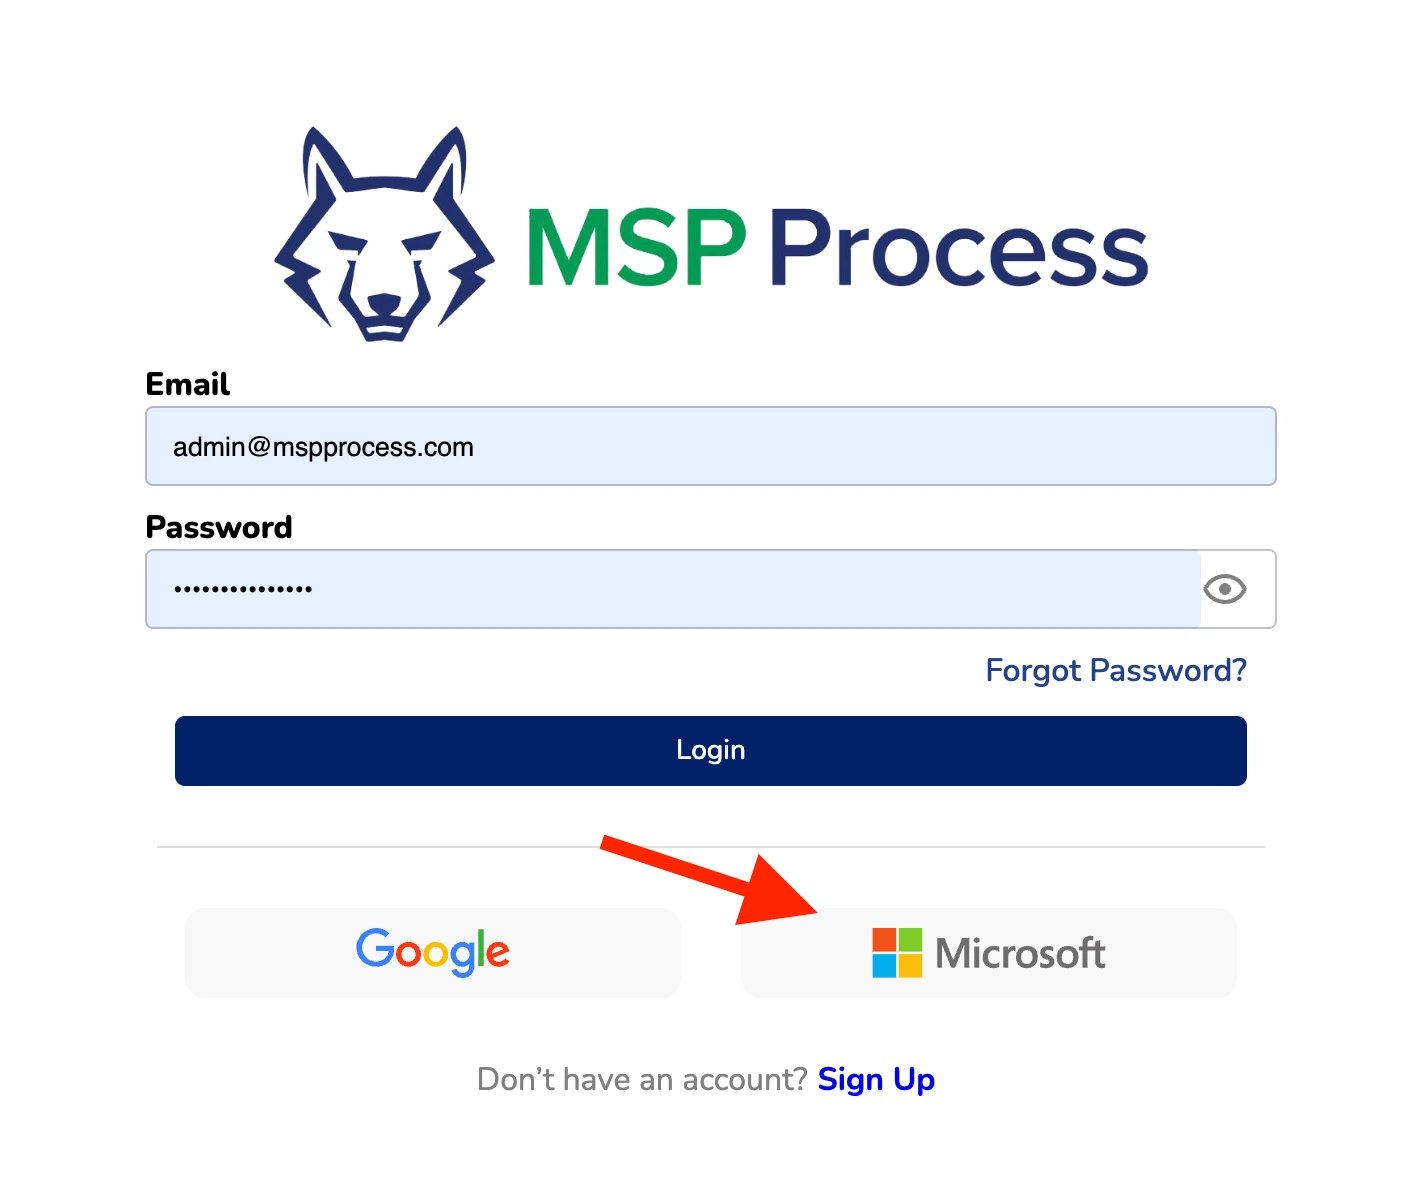
Your technicians just need to click on the Microsoft button on the MSP Process login page: